Detailed Instructions
for Choosing a Jaybird False Bottom
and Associated Options
from NorCal Brewing Solutions
The majority of Jaybird false bottoms have common components and options available:
· The false bottom itself
· Optional handle (or 2 handles)
· Optional hinge
· Optional Integrated Stand <or> Optional Separate Stand <or> Optional Element Stand
· Optional hole for dip tube
Options are selected through pull-down menus within the listing.
NOTE: Not all false bottoms have all options available and not all options can be combined (even though the listing may allow the combination to be selected).
For example:
· INTEGRATED STAND and HINGED FALSE BOTTOM - These 2 combinations are not possible
· HINGED FALSE BOTTOM and ELEMENT STAND and STAND EXIT PORT - These 3 combinations are not possible
If a specific listing doesn’t allow an option you desire please CONTACT US.
To enable you to make the best false bottom choice, each component and option is explained in detail:
FALSE BOTTOM:
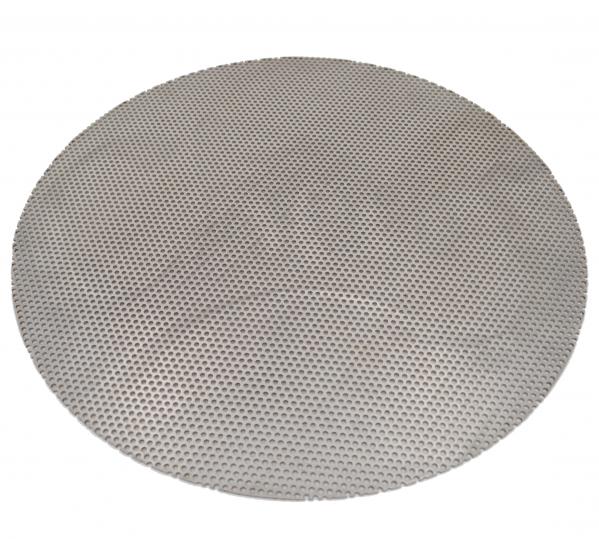 Jaybird False Bottom
· All Jaybird false bottoms are heavy duty 16 gauge perforated 304 stainless steel, with 3/32” holes on 5/32” centers.
· When used in a mash lauter tun, a Jaybird false bottom produces maximum sugar extraction efficiency while allowing a minimum amount of grain particles to pass through to the holes.
· When used in a boil kettle, a Jaybird false bottom filters hops and adjuncts (orange peels, coriander seeds, etc.) away from dip tube and vessel’s exit port.
OPTIONAL HANDLE(S):
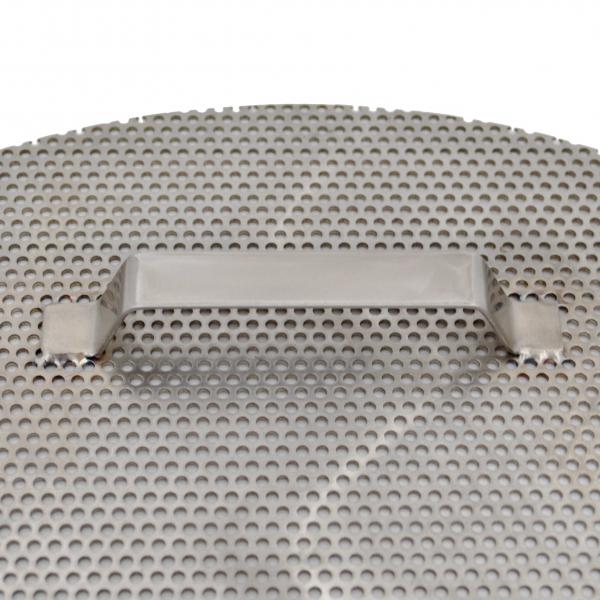 Jaybird False Bottom Handle
· Handles allow for versatile insertion and removal of the false bottom in one easy motion. Save your fingernails!
· Handles are 304 stainless steel, and are permanently welded to the top side of the false bottom.
· Select up to 2 handles in the drop-down menu:
o One handle: Handle is mounted 2.5 to 3 inches in from the edge of the false bottom. If there is a hinge (see “Optional Hinge” section) on the false bottom the handle is welded parallel to the hinge.
o Two handles: 2 handles are welded to the false bottom directly opposite and parallel to each other, 2.5 to 3 inches in from the outside edge of the false bottom.
§ If a hinge is added to the false bottom the handles are welded to the false bottom directly opposite and parallel to each other – and parallel to the hinge – 2.5 to 3 inches in from the outside edge of the false bottom.
OPTIONAL HINGE:
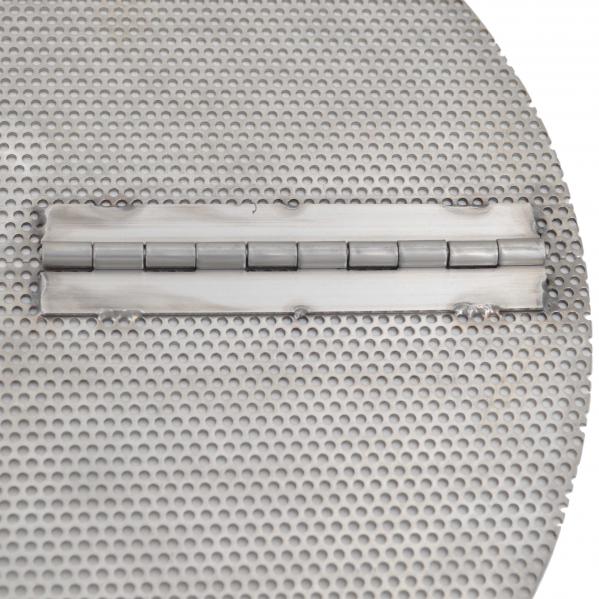 Jaybird False Bottom Hinge
· If the vessel has a manway or other opening that is smaller in diameter than the false bottom diameter, a hinge must be added to the false bottom.
o A hinge allows the false bottom to be inserted through the opening, then folded open and laid flat once inside.
· Hinge runs down the center of the false bottom, and is slightly shorter than the diameter of the false bottom.
o On false bottoms < 12 inches in size, a single hinge run is used. On larger false bottoms 2 hinges are used; one above the center of the false bottom and one below.
o If a dip tube hole (see “Optional Hole” section below) is added, the hinge(s) do not impede the hole.
· Hinge is welded to the BOTTOM side of the false bottom, giving it extra support.
o If a FALSE BOTTOM STAND is added (see below) the hinge is welded to the TOP side of the false bottom. This allows the stand to fit nice and flat against the bottom of the false bottom, offering the ultimate in weight support.
FALSE BOTTOM STAND:
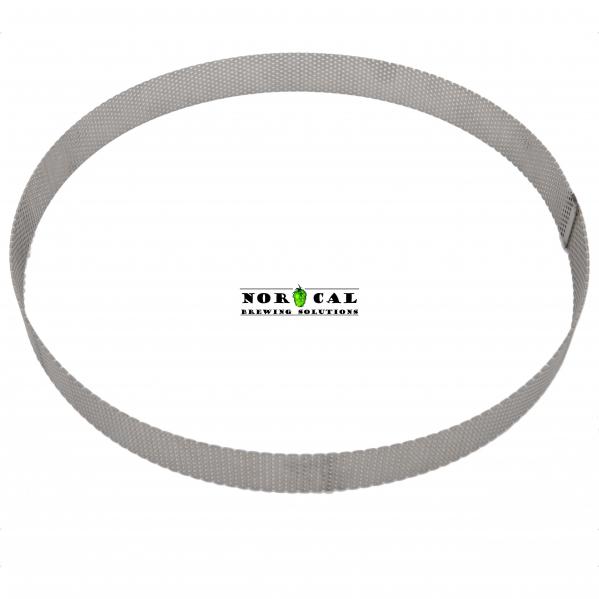 Jaybird False Bottom SEPARATE STAND
(used in False Bottoms up to 17.99 inches)
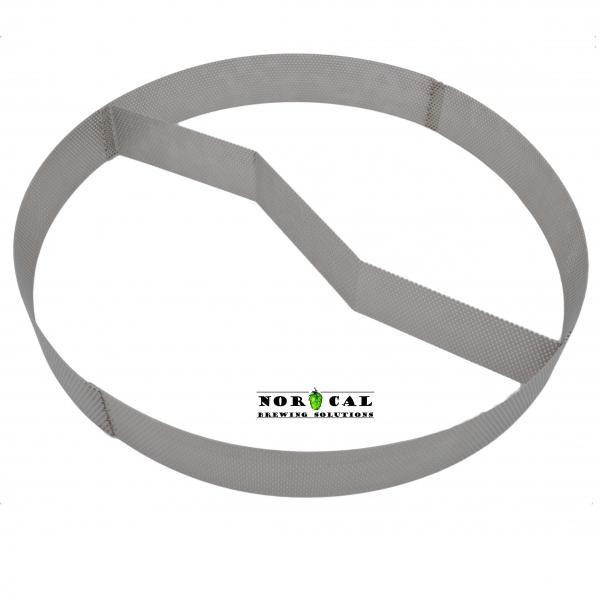 Jaybird False Bottom SEPARATE STAND
(used in False Bottoms 18 to 23.99 inches)
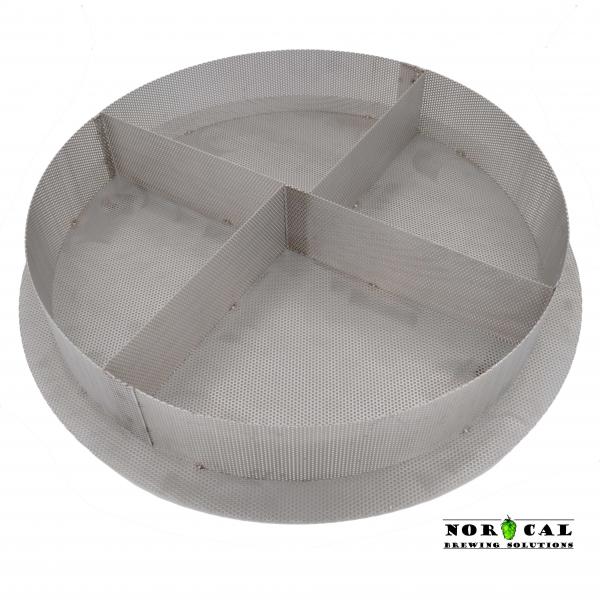 Jaybird False Bottom
INTEGRATED STAND (used in False Bottoms 24 inches and larger)
· “Dead space” is required between the false bottom and the vessel’s physical bottom. If there is a vessel “shelf” that can support the outer perimeter of the false bottom (the concave bottom of a keg does have this support, for example) then you might not need a stand. Otherwise, a stand must be used under the false bottom to lift the false bottom off the vessel floor, providing the necessary dead space.
· STAND MATERIAL: Stands are made from the same heavy duty 16 gauge 304 stainless steel material as the false bottom. They support A LOT of weight, offer additional filtration, and help prevent grain particles or trub material from entering the dip tube or VESSEL EXIT PORT (see definition below).
· STAND HEIGHT: In most false bottom offerings default stand height is 2 inches tall (this varies depending on if the false bottom is designed specifically for a given kettle, barrel, or other vessel). Selecting a taller or shorter stand height increases the price of the stand. Maximum stand height is 4” – If you need a stand larger than 4” please CONTACT US.
Select the options and stand height you want through the offering’s pull-down menus. Please keep in mind that certain false bottom offerings (such as false bottoms specifically designed for a brand and model of kettle) will NOT accommodate some of the stand options we discuss here. If a given offering doesn’t give you a pull-down menu option to select some aspect you desire CONTACT US.
It is important to understand a few definitions and limitations:
· VESSEL EXIT PORT: This the vessel’s “liquid out” opening: Usually a drilled hole in the vessel wall with a spigot or ball valve attached. The false bottom will either sit ABOVE or BELOW the VESSEL EXIT PORT.
· STAND EXIT PORT: If the false bottom sits ABOVE the VESSEL EXIT PORT then the stand will possibly need a STAND EXIT PORT: A cut-out in the stand that accommodates the VESSEL EXIT PORT and its associated plumbing.
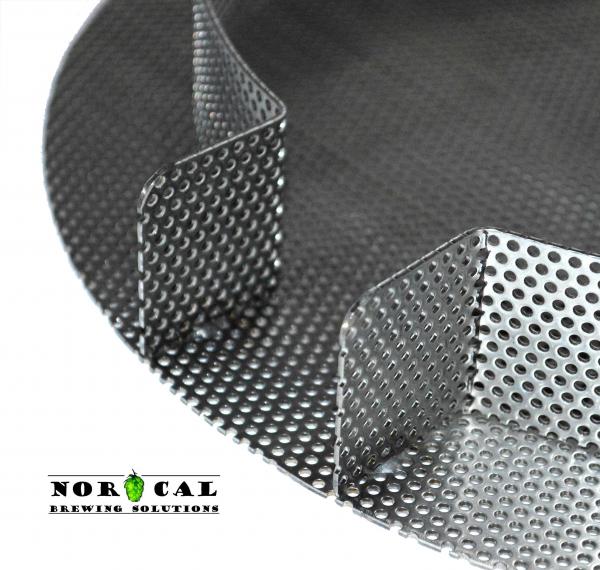 INTEGRATED
STAND with STAND EXIT PORT
· INTEGRATED STAND: A round stand permanently welded to the false bottom. It is centered on the false bottom and inset 1 - 1.5 inches from the false bottom’s outer edge all the way around. Depending on the application you may or may not want a STAND EXIT PORT built into the stand. If your application requires a STAND EXIT PORT opening please leave notes in the “ordering instructions” section of the shopping cart page.
· INTEGRATED STAND cannot be used with a hinged false bottom!
· SEPARATE STAND: A round stand completely separate and un-attached to the false bottom. It is designed to manually be placed under the false bottom, inset 1 - 1.5 inches from the false bottom’s outer edge all the way around. Depending on the application you may or may not want a STAND EXIT PORT built into the stand. Our false bottoms come with a round stand by default, with no STAND EXIT PORT opening. If your application requires a STAND EXIT PORT opening please leave notes in the “ordering instructions” section of the shopping cart page.
O SEPARATE STAND works great with a hinged false bottom. If a hinge is added to the false bottom the hinge is automatically welded to the TOP side of the false bottom.
· ELEMENT STAND: A round stand that is designed to accept a heating element that is inserted through the vessel wall and extends through the stand wall. The stand is centered on the false bottom and inset 1 - 1.5 inches from the false bottom’s outer edge all the way around. Depending on the application it may or may not have a STAND EXIT PORT built into it.
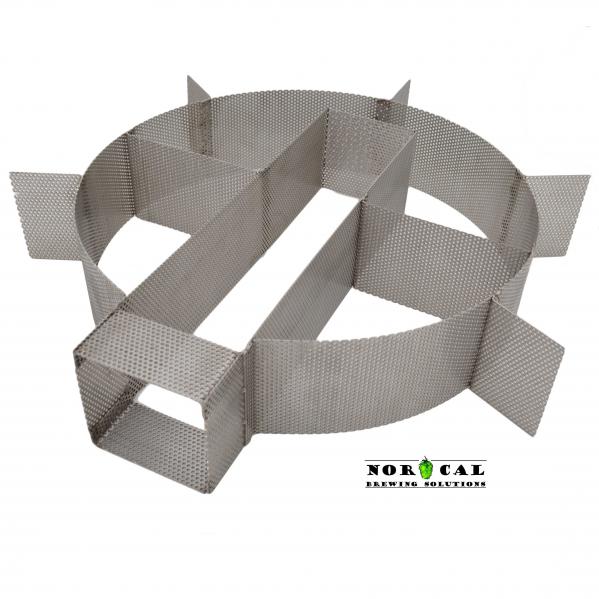 SEPERATE STAND that is an ELEMENT STAND
O ELEMENT STAND must be at least 3 inches tall in order to allow enough height clearance to accommodate a heating element.
O ELEMENT STAND can only be used with false bottoms 18 inches in diameter or larger in order to allow enough depth clearance to accommodate a heating element.
O ELEMENT STAND can be an INTEGRATED STAND or SEPARATE STAND. Depending on specific false bottom listing you might be able to select the type, or it may not be an option.
· If BOTH an ELEMENT PORT and a STAND EXIT PORT are specified:
O The stand type must be an INTEGRATED STAND
O STAND EXIT PORT will be at 6:00 o’clock (bottom) position, and ELEMENT PORT LOCATION must be selected in one of the following positions:
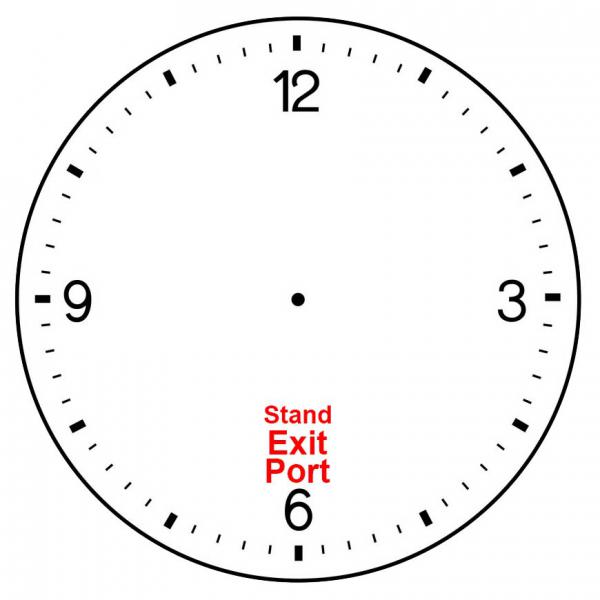

· 12:00 o’clock (top) position
· 3:00 o’clock (right) position
· 9:00 o’clock (left) position
Do you want the false bottom to sit ABOVE or BELOW the VESSEL EXIT PORT?
o If you are purchasing one of our custom-designed offerings (for a specific brand and model of kettle, for example) we make the choice for you, and include a stand of the appropriate height AND an appropriate STAND EXIT PORT to accommodate the VESSEL EXIT PORT.
o Otherwise, you need to decide:
o Placing the false bottom ABOVE the exit port:
§ PRO: Eliminates the need for a dip tube going through the false bottom (see “Optional Hole” section). If you add an INTEGRATED or ELEMENT STAND stand it will have a 1.5” STAND EXIT PORT.
§ CON: Reduces the amount of volume remaining in the vessel above the false bottom.
o Placing the false bottom BELOW the exit port:
§ PRO: Allows more volume in the vessel above the false bottom.
§ CON: Requires a dip tube, and a hole in the false bottom for the dip tube to pass through (see “Optional Hole” section).
OPTIONAL HOLE:
· A hole is required in the false bottom if the false bottom sits BELOW the VESSEL EXIT PORT. A dip tube passes through the hole.
· Standard hole size is 1/2 inch in diameter, which accommodates a 1/2 inch (outer diameter) dip tube.
· You can specify the size and location of the hole in the Shopping Cart Text Box Area.
WRAPPING TUBING AROUND A CUSTOM FALSE BOTTOM:
· Some customers wish to wrap silicone tubing around their custom false bottom. WE HIGHLY DISCOURAGE THIS. Yes, you gain a tight seal when everything is new, but the long term headache of replacing torn silicone tubing on a regular basis might get frustrating.
· Please keep a few things in mind:
o Your false bottom will be cut about 1/4" smaller in diameter than your specified vessel diameter. The false bottom will never grow bigger - no matter how much you tug and pull on it! You will have to use silicone tubing as a gasket FOREVER.
o If your false bottom is HINGED you are in for an EXTRA headache properly fitting tubing around the hinge areas.
· If you STILL want to go the silicone tube wrap route, GO FOR IT! The customer is always right... and who are we to stifle your creativity?
ITEM LISTING and SHOPPING CART "Additional Instructions" TEXT BOX AREA:

Use the text box area of the listing screen and/or Shopping Cart screen to give further instructions on the options you choose.
HOW TO MEASURE YOUR VESSEL TO GET THE EXACT SIZE OF THE FALSE BOTTOM YOU NEED:
The video below (from our YouTube channel) shows how to precisely measure a vessel to determine the size of the false bottom you need.
Video: How to Measure a Kettle for Proper False Bottom Size
WHAT IS AN INTEGRATED STAND?
The video below (from our YouTube channel) shows how integrated stand false bottoms work.
Video: Integrated Stand False Bottoms
PROUDLY MADE IN THE USA